Showing posts with label Dessert. Show all posts

Sunday, March 18, 2012

S'mores Cookies Recipe - Enjoy Summer in March!

Even though I live in the sunny Golden state, it still rains. And, because I live less than a mile from the beach (no, no, I'm not bragging, I swear!), it gets very cold and damp sometimes. Yesterday was one of those chilly, rainy Saturdays that demand copious amounts of tea and the baking of some new and exciting treat.

S'mores Cookies

While at the grocery store, I got a hankering for s'mores. As a former camp counselor, s'mores are a favorite summer treat. The stick fingers, the crumbling graham crackers, the oh-so-satisfying Hershey bars. To die for.

But, since it was cold and chilly and clearly not campfire season, I had to resort to a different method of fulfilling my craving. I searched the net and found this amazing recipe for s'mores cookies on The Girl Who Ate Everything, which is fast becoming a favorite food blog. Amazing recipes and even better photos!

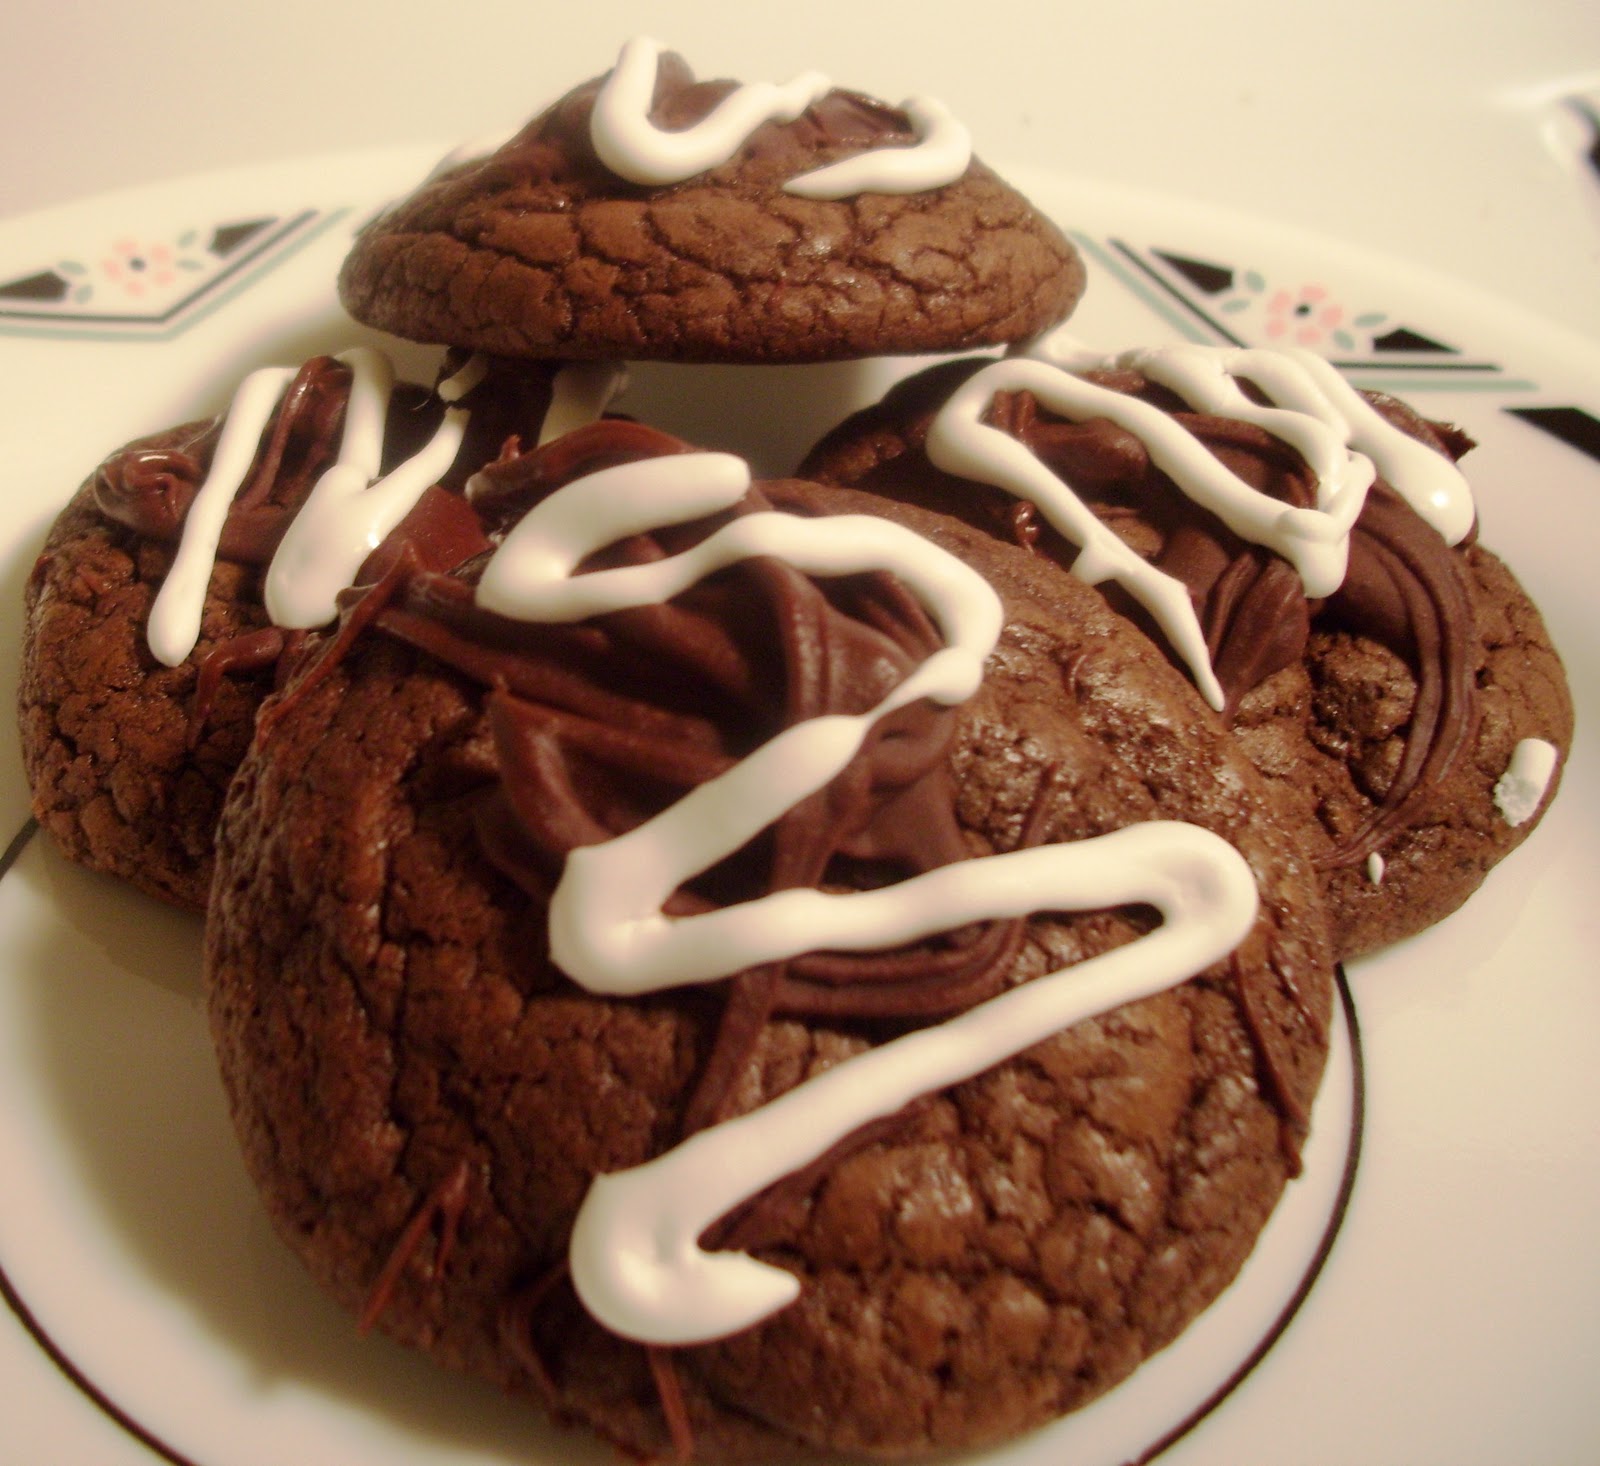
Let me tell you. These. Cookies. Are. Amazing. Definitely not on the healthy list, but, after my boss and one of my coworkers and I worked for 12 hours on Friday, these were necessary. I will definitely be bringing them to work tomorrow!


Tip: Try them frozen. Absolutely devine.

So, straight from the mouth of The Girl Who Ate Everything:

S'mores Cookies
Source: Ice Cream Before Dinner

11 Tablespoons unsalted butter, softened
1 cup brown sugar, packed
½ cup granulated sugar
2 large eggs
1 teaspoon vanilla
1 teaspoon baking soda
½ teaspoon sea salt
1 teaspoon cinnamon
2 ½ cups flour
1/2 cup semi-sweet chocolate chips
1 cup mini marshmallows
3 regular sized Hershey’s bars, broken into pieces
1-2 packages graham crackers, broken into squares

Directions:
Preheat the oven to 375 degrees. Line baking pans with parchment paper. I used one 11x17 pan and one 9x13 pan but you can really use any sized pans you want.

Lay out graham crackers side by side on the pans as close as possible (they should be touching). I used 16 graham cracker squares on one pan and 10 squares on another. You may have to add or remove graham crackers according to how much dough you have. If you want your cookies thicker you will use more dough and less graham crackers.


In a medium bowl, whisk together the flour, baking soda, sea salt and cinnamon to combine. Set aside.

In the bowl of an electric mixer, cream butter with white and brown sugar until light and fluffy. Add the eggs and vanilla and mix until combined.

Add the flour mixture to the butter mixer and combine on low speed.


Fold in the chocolate chips and marshmallows. Chill dough in refrigerator for 1 hour to overnight. (Note from Carrie - I chilled for an hour and it worked perfectly).

Place tablespoons of dough on graham crackers about 1 – 1 ½ inches apart. I averaged about 1 1/2 tablespoons of dough per graham cracker square as seen in the picture above. Press down slightly with fingertips.


Bake for 5 minutes then remove from oven to press Hershey’s bar pieces on to the top. You can place as many pieces or as little as you want depending how much chocolate flavor you want.

Bake for 5 – 7 more minutes or until dough is beginning to turn golden brown at the edges. Remove to a wire rack to cool. For clean cutting make sure cookies are completely cool and cut with a sharp knife.

Fresh from the oven, pre cooling and cutting.

Thursday, March 8, 2012

Not-So-Red-Velvet Cupcakes with Old-Fashioned Velvet Icing

Posted by Nichole Leigh

Hi there Veggie Horizons readers! Things have been cra-a-a-zy in the Burgh. Yours truly has had every little moment of her free time absorbed by a myriad of exciting (non-food) related writing projects. Most notably, I've started an organization called Write On Pittsburgh, and have been taking on freelance work like wildfire!

But that doesn't mean that I haven't missed you, and it doesn't mean I haven't been cooking. I've actually been saving this recipe since Valentine's day (embarrassing, I know). However, these cupcakes are so good that there's no reason not to make them this weekend!

Not-So-Red Velvet Cupcakes with Velveteen Icing
These are likely to be the moistest, most delicately flavored red velvet cupcakes you'll ever eat. The heaping helping of vanilla and 'just-right' amount of cocoa is inspiring. On top of the taste (pun intended) the icing is creamy, and doesn't harden when chilled like buttercream. The lack of artificial food coloring means that they're not particularly red, but I doubt anyone will stop stuffing their faces long enough to care. Once again, the recipe is adapted from Vegan Cupcakes Take Over the World. Recipe makes 12 cupcakes.
Ingredients:
1 cup almond milk
1 tsp apple cider vinegar
1 1/4 cup flour
1 cup sugar
2 tbs cocoa
1/2 tsp baking powder
1/2 tsp baking soda
1/2 tsp salt
1/3 cup canola oil
2 tbs red food coloring or 1 3/4 tbs cherry juice + 1/4 tbs cornstarch (I used my very own homemade food coloring, recipe to come)
2 tsp vanilla extract
1/4 tsp almond extract
1 tsp chocolate extract 

Directions
1. Preheat oven to 350F (175C) and line a cupcake tin.

2. In a medium-sized bowl, combine the almond milk and vinegar and set aside to curdle.

3. In another bowl, mix together the flour, sugar, cocoa, baking powder, baking soda and salt. Set aside. 

4. Add the oil, food coloring and extracts to the curdled soy milk and whisk well to combine. Sift the dry ingredients into the wet and fold to combine, mixing just until large lumps disappear. 

5. Pour into liners and bake 18-20 minutes. 

6. Top with the Velveteen Icing (recipe follows)

Old-Fashioned Velvet Icing
I love this icing so much that I am thinking about abandoning buttercream entirely. It's so smooth, silky, and utterly delicious. It's for spreading, not piping, but don't let that stop you!

Ingredients
2 tbs all purpose flour
1/2 cup almond milk
1/4 cup non-hydrogenated vegetable shortening
1/4 cup non-hydrogenated vegetable margarine
2 tsp vanilla extract
1 cup superfine or castor sugar
Directions
1. In a small saucepan over medium heat, whisk together the flour and almond milk. Stir constantly until mixture starts to thicken and has a pudding like consistency, about 3-4 minutes. Remove from heat and allow to cool two minutes. Transfer to a large bowl and press plastic wrap onto the top of custard to prevent a skin from forming. Allow mixture to cool completely before next step. (I usually put it in the fridge for 20-30 minutes.)

2. Cream together the shortening, margarine, vanilla, and sugar, then beat in cold custard. Beat with electric mixer 5-7 minutes. (This part is important, the longer you beat it the thicker and stiffer the frosting will become. I suggest beating for the full 7 minutes.) Frosting should become lighter in color and have a very creamy texture, similar to very thick whipped cream. Frost on cooled cupcakes.

Thursday, February 2, 2012

Toasted Coconut Almond Chocolate Cupcakes

Posted by Nichole Leigh


As I mentioned before, I'm kind of obsessed with coconut. I want it in everything... curry, cookies, and cupcakes! This delicious, toasty cupcake is now officially my favorite. If you're craving even more toasted coconut, I highly recommend the Lazy Samoa Cookie.

A Note About Dessert
I'm not sorry that I love cake. I'm not ashamed of the fact that I like fat and sugar.

I am aware of the catastrophic effects of diabetes, the recent discussion of "toxic sugar," and the "obesity epidemic," and all that. I think it's pretty evident that processed fats and sugars are addictive and dangerous, to both mind and body.

But I still believe there is a place in a healthy diet for certain kinds of dessert! A piece of cake made from wholesome, natural ingredients is a rare, special an indulgence. It is an opportunity to be grateful for all the pleasures that life affords. That doesn't mean eat that we should eat a rich dessert every day, or an entire cheese cake in one sitting, but hey....

If you're rocking a well rounded diet, normal blood sugar levels, and a healthy body weight, let's put the shame and self-denial down for a hot second and enjoy a nice cupcake.


Toasted Coconut Almond Chocolate Cupcakes
This cupcake has a dense, moist texture with delicate hints of coconut and almond. It's almost fudgy, and absolutely delicious. This recipe is inspired by the Toasted Coconut Cupcakes in the stalwart Vegan Cupcakes Take Over the World. If you haven't bought this book yet - just do it.


Ingredients
1 cup all-purpose flour
1/3 cup cocoa powder
1 1/2 tsp baking powder
1/4 tsp salt
1/4 cup coconut oil, warmed so that it is in liquid form
1 cup coconut milk (recipe below)
3/4 cup granulated sugar
1 tsp vanilla extract
1 tsp coconut extract (or more vanilla extract if you don’t have coconut extract)
1 teaspoon almond extract
1/2 cup shredded, unsweetened coconut
1/2 cup Toasted Coconut (recipe below)


Directions
1. Preheat the oven to 350F, and line cupcake tins.
2. In a medium bowl, sift together flour, cocoa, baking powder and salt.
3. In a separate, large bowl, combine the coconut oil, coconut milk, sugar, vanilla and almond extracts.
4. Add the sifted ingredients to the wet ingredients 2 batches, stirring between to fully incorporate the ingredients.
5. Fold in the shredded coconut.
6. Divide the batter evenly into twelve cupcake liners, filling each about 2/3 full.
7. Bake for 24-26 minutes, or until a toothpick inserted into the cupcake comes out clean.


Additional Recipes:
Homemade Coconut Milk
I never buy coconut milk. Why would I when it’s so easy to make at home? Especially if you’ve already got dried coconut on hand because you’re making Toasted Coconut Almond Cupcakes or Lazy Samoas. This will keep in the refrigerator for about a week. The coconut milk may separate a bit after a while, but stirring will restore it to an even consistency. Yield: 5 Cups.

Ingredients
1 cup shredded, unsweetened coconut
4 cups warm, filtered water

Directions
Puree the ingredients together in a blender until smooth, about 2 minutes. Yep, it’ really that easy.


Toasted Coconut
Perfect and neccessary for coconut cupcakes and cookies, this little condiment is also delicious on oatmeal! Yield: 1/2 cup (obviously)

Ingredients
1/2 cup shredded, unsweetened coconut

Directions
1. Heat a large (preferably cast iron) pan on medium. Add the shredded coconut, and stirring constantly, cook until it begins to turn golden brown, 2-3 minutes. Remove from the heat and allow to cool. (If it the coconut continues to brown too much after being removed from the heat, spread it out on a large plate or baking tray to speed up the cooking process.)

Saturday, December 24, 2011

Happy 4th Night of Chanukah: Spiced Olive Tapenade, Garlic Latkes with Fig Apple Sauce, and Chanukah Nut Cake with Honey Syrup


Image from Jewlicious.com

Hi there Veggie Horizons Readers! I felt like the blog was getting a bit Christmas heavy, what with all the Christmas cookies. I feel like  my Jewish buddies are being left out. We can’t have that! In their honor, I’d like to share a couple of recipes that I looked up for Chanukah celebrations.

Caveat: I don’t celebrate Chanukah, but I have many beloved friends who do! I do not profess to be an expert in the holiday itself, or the culture's traditional gastronomy. I've used multiple resources to locate and compile these recipes. (See the end of the post for a list of sources). I apologize if I get anything wrong. Please send me a comment if you see something incorrect, and I will fix it ASAP! 

Spiced Olive Tapenade on Challah Toast
This recipe comes from the NewKosher Cookbook: Your Favorite Jewish Vegan Recipes, and though it is not listed in the sample “Chanukah menu,” I think it sounds like a nice little holiday appetizer!

Ingredients
1 cup colossal green olives, any variety, pitted
1 cup colossal black olives, any variety, pitted
2 cloves garlic, crushed
2 tablespoons lemon juice
Olive oil
Ancho chili powder, to taste
12 slices challah
2 tablespoons lemon zest
2 tablespoons fresh parsley

Directions
1. Combine olives, garlic, and lemon juice in food processor and blend, drizzling in olive oil until a spreadable consistency is reached. Add ancho chili powder to taste.

2. Brush challah slices with olive oil and grill or toast in over at 350 degrees Fahrenheit until edges turn golden brown. Serve warm, spread with tapenade and sprinkled with parsley and lemon zest.

Garlic Latkes with Fig Apple Sauce
These latkes won “best in show” at the Atlanta Cevre Minyan latke cooking contest. You can find the original recipe at Jewish Vegetarians of North America and in the NewKosher Cookbook: Your Favorite Jewish Vegan Recipes. Recipe by Patrick Aleph.

For the Garlic Latkes
Ingredients
1 bag frozen hash browns, thawed
1/4 cup all-purpose flour
1/2 teaspoon baking powder
Equal parts garlic salt and pepper (a dash for every latke)
Vegetable oil

Directions
1. After thawing the hash browns, squeeze out as much liquid as possible. It helps to use cheese cloth or paper towels. There won't be too much liquid and it saves a lot of time one otherwise spends grating potatoes and onions.

2. Mix flour and baking powder to potato mixture.

3. In a pan, pour a thin layer of vegetable oil. Drop one tablespoon of potato batter into oil and fry until golden brown on both sides. In a regular pan, you should be able to cook at least four latkes at once.

For the Fig Apple Sauce
Ingredients
1 jar apple sauce
Handful dried figs
1 cup hot mint tea
Four brown cardamom pods
Pumpkin pie spice or a combination of cinnamon, nutmeg, mace, and allspice (to taste)

Directions
1. Boil one cup of mint tea with cardamom pods. After tea is brewed, remove pods and steep the dried figs for five minutes or until figs are plump.

2. Remove figs from tea and blend in food processor. Slowly add apple sauce until well blended.

3. Add pumpkin pie spice (a mix of cinnamon, nutmeg, mace and allspice) to taste.

4. Serve chilled with latkes.

Chanukah Chocolate Mousse
This recipe comes from JewishPath.com, and is listed specifically for the fourth day of Chanukah (This year, that’s December 24th) It's not vegan, but it sounds delicious! 
Ingredients
4 ounces chocolate (milk, semi-sweet or sweet)
4 eggs, separated

1 cup margarine

whipped topping


Directions

1. Melt chocolate in microwave. Add egg yolks and margarine. 

2. Mixing with fork, cook over low heat until thick or cook in double boiler over rapidly boiling water, stirring until mixturebecomes thick. Set aside to cool. 

3. Beat egg whites until stiff. Fold into chocolate mixture. Put into serving dishes and refrigerate. 

4. Top with whipped cream and serve.


Wednesday, December 21, 2011

12 Days of Christmas Cookies - Gingerbread Biscotti (Vegan)

Posted by Nichole Leigh

So.... Day 12. I am almost at a loss for words. After so many cookies and so many posts - I kind of don't want it to be over. Oh well, there's always next year! I have at least 4 holiday cookiesthat I didn't get around to this year, so maybe this will be annual?

Well, anyway, this final cookie is one of my new holiday favorites. I've never made biscotti before. (Perhaps I've been avoiding anything so overtly Italo-American so as not to feel like a stereotype?) In Italian, biscotti means "cookies" (not cookie... the word is actually plural). Any type of cookies. Not just the log-shaped ones that we are familiar with on this side of the ocean. But, I can't deny that the Italo-American concotions are delicious. So here is my holiday biscotti! I like it so much I'm thinking of making large amounts of dough and freezing it for quick biscotti making in the future.

Gingerbread Biscotti
This cookie is a grown up version of the childhood favorite - requiring no pressing, rolling, or decorating. It's plenty spicy and full of ginger flavor. Furthermore, this dunkable wonder is the perfect compliment to a cup of Earl Gray Tea on a cold, rainy day. It's a bit labor intensive, but don't let that scare you away! It's worth it.

Ingredients
1/4 cup molasses
2/3 cup sugar
2 tablespoons ground flax seeds
1/2 cup canola oil
2 tablespoons soy milk
1 teaspoon pure vanilla extract
1 3/4 cups all-purpose flour
2 teaspoons ground ginger
1 1/2 teaspoons ground cinnamon
1/2 teaspoon ground nutmeg
1 1/2 teaspoons baking powder
1/2 teaspoon salt
1/4 cup slivered almonds (optional)

Directions
1. Preheat oven to 350ºF. Line a baking sheet with parchment paper.

2. In a large bowl, beat together molasses, sugar, flax seeds, oil, non-dairy milk, and vanilla with a wire whisk until smooth.

3. Sift in the flour, ground ginger, cinnamon, nutmeg, baking powder and salt. Stir with a wooden spoon or rubber spatula to form a smooth dough, then knead in the chopped slivered almonds (if using), pushing any bits that pop out back into the dough.

4. For a log about 11 inches long by 4 inches wide, using a rubber spatula to even the edges and flatten the end sides of the log. Bake for 28 to 30 minutes until the log is puffed and firm but not too brown. It will spread a little, and some cracking is okay. Place the baking sheet on a wire rack, turn off the oven, and allow the log to cool for at least 45 minutes. If any edges of the log are too browned, gently trim them off with a sharp, heavy knife.

5. Preheat the oven to 325ºF. Very carefully, slide the log off the baking sheet and onto a cutting board. With a sharp, heavy knife, cut log into ½-inch-thick slices, using one quick and firm motion, pressing down into the log. Very gently move slices to the baking sheet, standing them of their bottom edge if possible. Rebake the slices for 22 to 24 minutes. The slices should appear dry and slightly toasted, but do not allow them to get too browned. Allow the biscotti to cool 10 minutes on the baking sheet, then carefully move them to the wire racks to complete cooling (warm biscotti may be fragile). Store in a loosely covered container.

Tuesday, December 20, 2011

12 Days of Christmas Cookies - Espresso Fudge Brownies (Vegan)

Posted by Nichole Leigh

Okay, so these technically aren't cookies. They're brownies.... or maybe we can consider them bar cookies? Honestly, they're so delicious I don't think any of your cookie fans will be complaining if you serve them up this holiday season. In fact, they'll probably be too busy stuffing their faces to quibble about much of anything, much less the correct catagorical  grouping of various baked goods.


Espresso Fudge Brownies
These brownies are dense, fudgy, and absolutely to die for. They are a bit thinner than your average from-the-box brownie, but don’t let their looks fool you. They pack a huge chocolaty punch. I played around with the extracts and added orange extract to make one of my favorite combos: orange-espresso-chocolate, which you may remember from the Orange-Mocha Cupcakes. However, if you don’t like to mix your orange and chocolate, use a full teaspoon of vanilla.
Photo courtesy of Lynne at Milk and Cookiezzz. My camera is still out of commission, but hopefully I will have my own pictures up soon. They do look exactly like this though - so it's a very reliable represenation.
Ingredients
3 ounces bittersweet baking chocolate, chopped (try and find it in bar form in the baking aisle)
5 tablespoons  non-hydrogenated  vegetable margarine (like Earth Balance)
2/3 cup sugar
1/3 cup soy milk
1 tablespoon cornstarch or arrowroot powder
1 tablespoon espresso powder

1/2 teaspoon vanilla
1/2 teaspoon orange extract
3/4 cup plus 2 tablespoons all-purpose flour
1/2 teaspoon baking powder
3 tablespoons cocoa powder
Pinch salt

Directions
1. Preheat oven to 350˚F and grease a 8x8 pan


2. Melt margarine and chopped chocolate in the microwave for about 1 ½ to 2 minutes, or until fully melted. Stop the microwave about halfway through to mix the two together with a fork or whisk.

3. Whisk together soy milk, cornstarch, espresso, orange extract, and vanilla until foamy.

4. Combine with chocolate mixture

5. Sift in flour, baking powder, and cocoa powder, and salt

6. Fold until moistened. Don’t over-mix or your brownies will become tough.

7. Pour in to prepared pan and bake for 22-26 minutes, or until a toothpick inserted comes out with just a few crumbs and no gooey batter.  

Monday, December 19, 2011

12 Days of Christmas Cookies - Citrus Glitters (Vegan)

Posted by Nichole Leigh


Citrus Glitters
Imagine an ideal sugar cookie infused with lemon and decoarted with crunchy, glittery goodness and you'll have a pretty good understanding of the Citrus Glitter. These soft-on-the-inside-crisp-on-the-outside cookies are the perfect gift for your lemon loving friends. (In Italy.... the word lemon is transformed into the verb "limonare" that means "to make out," so perhaps these cookies will get you a little lovin' too!)
Photo courtesy of Vegan.com - My camera died last night, so I will post my own photo as soon as I'm able to revive it!


Ingredients
4 tablespoons Demerara sugar (like Domino’s Demerara Sugar)
1/2 cup non-hydrogenated vegetable shortening (like Spectrum Organics Vegetable Shortening)
1/4 cup soy milk
3/4 cup sugar
2 tablespoons lemon zest (or the zest of any other citrus fruit)
1/2 teaspoon lemon extract
1/2 teaspoon pure vanilla extract
1 cup  plus 2 tablespoons all-purpose flour
2 tablespoons fine-ground cornmeal (if you don’t have fine ground cornmeal, you can use a coffee grinder, magic bullet, or food processor to finely grind regular cornmeal)
1 tablespoon cornstarch or arrowroot powder
1/2 teaspoon baking powder
1/4 teaspoon salt


Directions
1. Preheat oven to 350F. Line two baking trays with parchment paper.


2. Spoon Demerara sugar onto a plate and put to one side.


3. Use a hand mixer to cream the shortening and sugar until fluffy. Mix in soy milk, citrus zest, vanilla and lemon extracts.


4. Add the remaining ingredients and mix on medium speed until a pliable dough forms it will look crumbly but will come together easily in your hands.


5. Roll heaped tablespoons pf dough into balls. Press each ball into the Demerara sugar to flatten it, coating one side only. Place the cookies sugar side up on baking sheets.


6. Bake for 10-12 minutes until lightly golden at the edges. Cookies will be very soft, so allow to cool for about five minutes on the baking sheet before transferring to a wire cooling rack to finish cooling completely.

Sunday, December 18, 2011

12 Days of Christmas Cookies: Cherry Almond Cookies (Vegan)


Posted by Nichole Leigh

I know that I already posted the Cherry Butter Cookies, but I just can't get over the cherry-almond combo. Consider these delicious cookies as the vegan alternative, though they are definitely more chewy and less cakey than the Cherry Butter Cookies. I actually think they would be amazing with chocolate chips as well, but I'm trying not to put chocolate in absolutely everything I make this season. 


Cherry Almond Cookies
The combination of dried cherries and slivered almonds in these cookies creates a lovely texture - chewy, crunchy, and crisp all at once!

Ingredients
1/3 cup canola oil
1/3  cup sugar
1/3  cup firmly packed sugar
3  tablespoons soy milk
2  teaspoons. ground flax seed meal
1  teaspoon vanilla extract
1/2  teaspoon almond extract
1 cup  all-purpose flour
1/4  teaspoon baking soda
1/4  teaspoon salt
3/4  cup  slivered almonds
3/4  cup dried cherries
Directions
1. Preheat oven 350F  degrees.  Line two baking sheets with parchment paper.
2. In a large bowl, use fork or whisk and vigorously mix oil, sugars, non-dairy milk, flax seeds, and extracts.  
3. Sift in flour, baking soda, and salt and mix.  When ingredients are mostly combined, add almonds and cherries and mix until thoroughly combined.
4. Drop cookies by generous tablespoons onto baking sheets–about 2 inches apart. Bake for 10 –  12  minutes until edges begin to brown.
5. Let the cookies rest on baking sheet for 5 minutes before transferring them to wire racks to cool completely.

Friday, December 16, 2011

12 Days of Christmas Cookies: Espresso Chip Oatmeal Cookies (Vegan)


Posted by Nichole Leigh


These delicious cookies manage to be somehow decadent and healthy (feeling) at the same time. Much like the Everything Oatmeal cookies, these morsels come with a smattering of unexpected but delicious flavors: espresso, oatmeal, and (of course) chocolate! They're also vegan.

Espresso Chip Oatmeal Cookies
They may not be the prettiest cookies you've every seen, but I guarantee they're among the most tasty! Cook them for 12 minutes if you like them a bit chewy, 14 if you like them crunchier. Recipe makes 2 dozen  cookies.
Ingredients
1/2 cup plain soy milk
1/2 cup canola oil
2 tablespoons ground flax seed meal (like Bob's Red Mill)
1/3 cup packed brown sugar
1/2 cup sugar
1 teaspoon vanilla extract
2/3 cup all purpose flour
1/4 teaspoon ground cinnamon
2 tablespoons instant espresso powder
1 tablespoon cocoa powder
3/4 teaspoon baking powder
1/4 teaspoon salt
1 3/4 cups oats
3/4 cup chocolate chips

Directions
1. Preheat oven to 350F. Line two baking sheets with parchment paper.

2. In a large bowl, mix together soy milk, oil, flax seeds, brown sugar, sugar, and vanilla until smooth. 

3. Sift in flour, cinnamon, espresso powder, cocoa powder, baking powder, and salt. Add oats and chocolate chips and stir until all ingredients are moistened.

4. Drop by tablespoon of dough about 2 inches apart onto baking sheets. bake for 12-14 minutes, until cookies are slightly puffed and edges appear dry.

5. Let cookies cool on baking sheets for 5 minutes, then transfer to wire racks to cool completely. 

Thursday, December 15, 2011

12 Days of Christmas Cookies: Lazy Samoas (Vegan)

Posted by Nichole Leigh
Day 6 of the Veggie Horizons 12 Days of Christmas Cookies Special is a Vegan cookie day! Now, I have this friend who: 1.) leans toward Veganism, 2.)is allergic to nuts, and 3.) doesn't like soft cookies (unlike yours truly) so finding a cookie that she can eat (and love) is a bit of a challenge.
But never fear, with the help of a new vegan cookie cookbook, Vegan Cookies Invade Your Cookie Jar (the cookie slinging sister to my prized and oft used Vegan Cupcakes Take Over the World), I think I may have found something that fits the bill.


Lazy Samoas
These cookies are true to their name, and are rather easy to make. They're probably easier if you stock some of the basic vegan cooking items. If you're having trouble finding some of the ingredients, check your local health food store, as they're all fairly common (we're talking soy milk here, not fresh black truffles). Serve to your vegan and omnivorous friends alike! There are also many online vegan supplier like Cosmo's Vegan Shoppe that could be useful for locating more difficult to find items. 

Ingredients
2 cups grated, unsweetened coconut
1/3 cup unrefined coconut oil (like EfaGold Coconut Oil - available on Amazon, and at most health food stores)
3/4 cup firmly packed brown sugar
1/3 cup soy milk
1 tablespoon ground flax seed meal (like Bob's Red Mill - available on Amazon, and at most health food stores)
1 1/2 teaspoons pure vanilla extract
1 cup all-purpose flour
1/4 teaspoon baking soda
1/2 teaspoon salt

For the Chocolate Drizzle:
1 cup vegan chocolate chips (like Tropical Source Chocolate Chips - available on Amazon, and at most health food stores)
2 tablespoons unrefined coconut oil

Directions
1. Preheat oven to 350F. Line two baking sheets with parchment paper.

2. Pour the grated coconut into a large heavy skillet and toast over medium-low heat. Stir occasionally and toast coconut to a light golden brown, about 8 to 10 minutes. Watch carefully to avoid burning. Promptly remove the coconut from the heat and stir it occasionally as it cools. If the coconut continues to turn overly brown promptly pour the skillet into a large dish and spread around to help hasten cooling and stop cooking.

3. In a large mixing bowl, combine the coconut oil, brown sugar, non-dairy milk, flax seed meal, and vanilla until well blended and smooth.

4. Sift in all-purpose flour, baking soda, and salt and mix to form a thick batter. Fold in the toasted coconut.
5. Scoop about 1 tablespoon of dough 2 inches apart onto the baking sheets.  Flatten each cooking a bit, and use your fingertip to work a small hole into each center. Bake for 8 minutes, until the edges of the cookies are golden.

6. Let the cookies cool on the baking sheet for 5 minutes, then transfer them to wire racks to cool completely. Transfer the cooled cookies onto waxed paper, then place them onto a cutting board or other firm surface that can be easily slid onto a refrigerator shelf.

7. While the cookies are cooling, melt chocolate chips in a microwave or double boiler, then stir the coconut oil into the melted chocolate. Allow the chocolate to cool for 5 minutes to thicken slightly. Dip cookie bottoms into the chocolate and return them to the waxed paper. Now drizzle the remaining chocolate over the cookies, either by dipping a fork into the melted chocolate or by pouring the chocolate into a pastry bag fitted with a very small round tip. Chill the cookies for at least 30 minutes to completely firm up the chocolate. 

8. Store the cookies in a cool place. 

Wednesday, December 14, 2011

12 Days of Christmas Cookies - Pumpkin Chip Drops

Pumpkin isn't just for Thanksgiving, kids. It's a great ingredient that makes some really great desserts. I love pumpkin pie and pumpkin cookies. But this pumpkin cookie recipe kicks every other pumpkin cookie's ass.

Photo Courtesy of blog.buesink.com

The secret? A lot of ingredients that you wouldn't necessarily think would go together: pumpkin, chocolate chips, and oatmeal.

Ingredients:
  • 1 Cup butter, softened
  • 1 cup sugar
  • 1 cup packed brown sugar
  • 1 egg
  • 1 teaspoon Vanilla extract
  • 2 cups all purpose flour
  • 1 cup quick-cooking oats
  • 1 teaspoon baking soda
  • 1 teaspoon cinnamon
  • ½ teaspoon salt
  • 1 cup canned pumpkin
  • 1 cup chocolate chips
Directions:

Preheat oven to 350 degrees. Cream butter and sugars together. Beat in egg and vanilla. Combine flour, oats, baking soda, cinnamon and salt. Alternate with putting the flour mixture with pumpkin, beating after each addition. Stir in chocolate chips. Drop by tablespoons 2 inches apart on greased cookie sheets. Bake for 9 to 12 minutes until golden brown. Cool on wire racks. Makes 11 dozen.

Tuesday, December 13, 2011

12 Days of Christmas Cookies: Double Chocolate Peppermint Bites

Posted by Nichole Leigh

Double Chocolate Peppermint Bites
These delicious chocolaty bites are simultaneously rich and invigorating.They're a lot like a York Peppermint Patty in cookie form. The recipe calls for a large quantity of chocolate chips to be melted, so I would suggest using a double boiler to keep the melted chocolate warm and workable, without the risk of burning.

Ingredient

2 1/2 cups bittersweet chocolate chips (do not exceed 61% cacao; 15 to 16 ounces)

  • 1 1/2 cups all purpose flour
  • 1/4 cup natural unsweetened cocoa powder
  • 1 teaspoon baking powder
  • 1 teaspoon instant espresso powder
  • 1/2 teaspoon salt
  • 1/2 cup butter, room temperature
  • 1 cup sugar
  • 1 teaspoon vanilla extract
  • 1 1/2 teaspoon peppermint extract
  • 2 large eggs
  • Royal Icing for decorating


Directions

  • 1. Preheat oven to 375°F. Line 2 large rimmed baking sheets with parchment paper. 

    2. Stir 2 cups of the chocolate chips in a double boiler, or a medium metal bowl set over saucepan of simmering water until melted and smooth. Measure out 2/3 cup melted of chocolate; transfer to small metal bowl and reserve for drizzling.

  • 3. Whisk flour, cocoa powder, baking powder, espresso powder, and salt in medium bowl. 

    4. Using electric mixer, beat butter in large bowl until creamy. Add sugar and both extracts; beat until smooth. Add eggs; beat to blend. Beat in melted chocolate from medium bowl. 

    5. Add dry ingredients; beat just to blend. Stir in remaining 1/2 cup chocolate chips. 

    6. Roll about 1 tablespoon of dough between palms to form ball. Place on prepared baking sheet. Repeat with remaining dough, spacing cookies 2 inches apart on the baking sheet.

  • 7. Bake cookies until cracked all over and tester inserted into center comes out with large moist crumbs attached, 8 to 9 minutes. Cool cookies on baking sheet 5 minutes. Transfer cookies on parchment paper to racks to cool completely.

  • 8. Rewarm reserved 2/3 cup chocolate over small saucepan of simmering water or in the double boiler. Drizzle the melted chocolate over the cookies. Allow the chocolate to harden, 5-10 minutes.Then, pipe a small amount of royal icing in a zigzag pattern on top of the cookies. Allow to harden completely before serving.